SOCIAL MEDIA

Thursday, December 29, 2016

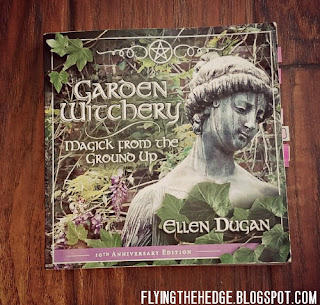
Book Review: Garden Witchery, Magic from the Ground Up by Ellen Dugan

Book Review: Garden Witchery, Magic from the Ground Up by Ellen Dugan

Disclosure: Some of the links below are affiliate links, meaning, at no additional cost to you, I will earn a commission if you click through and make a purchase.
 
Another book review! I've been home so I've been reading quite a bit lately. Just one book away from twenty-four this year. Maybe next year I can read more? The latest book I finished is Garden Witchery: Magic from the Ground Up by Ellen Dugan. Any hedgewitch or witch interested in herbs and herb magic MUST read this book!

As always I will begin with what I didn't like. Honestly, I don't have any complaints. While the book is fairly simple and based on Wicca, it still provides excellent information and even options for more advanced practitioners. The only section I felt was out of place was the chapter on the sabbats. While I enjoyed reading what her family does for the holidays, it seemed a wee bit out of place with the general theme of the book.
Book Review: Garden Witchery, Magic from the Ground Up by Ellen Dugan

This book, however, was fantastic all the same! Dugan is an experienced witch and gardener, making her an expert in garden witchery. I am in the process of planning our front yard for next year and this book was incredibly helpful. The floral language, plant correspondences, general gardening tips, and how the moon cycles affect gardening were wonderful! I cannot wait to add them to my grimoire and start my own gardening journal this year. There are wonderful plans to create themed gardens, including a faerie and Gothic gardens, and notes on how each plant will do in your area making this book an excellent resource.

While I have many books on gardening and herbs already, Dugan's book is by far the best thus far in regards to magical planting. Her stories and writing kept me engaged throughout and encouraged me to think through what I want from my garden. All the ideas running through my head cannot wait to take shape! However, Dugan reminds her readers to keep realistic expectations; start small. It takes years to grow a large garden and it is an ever-changing process.

Furthermore, Dugan offers a host of spells, rituals, and crafts you can employ to grow a magnificent garden, attract faeries, and bring peace and healing to your family. She also provides a basic guide to spell crafting using your herbs and flowers, reminding her readers that the magic comes from within us; all the extra stuff just helps the spell along. She encourages her readers to memorize correspondences, a suggestion I strongly endorse. Memorizing and utilizing the correspondences separates the novice from the experienced witch.

Overall, I give this book 5 stars, making it a must own for any hedgewitch or witch interested in herbal magic, lore, and remedies. It is an outstanding book, one I will be returning to again and again throughout my magical life.

As the year nears its end, have you managed to squeeze in any magical reading? If so, let me know! I always love expanding my library!


Wednesday, December 21, 2016

DIY Wildlife Ornaments

DIY Wildlife Ornaments

Yule is a time of giving, honoring life, and celebrating the birth of the Sun. I believe many people get so caught up in giving and receiving presents that they often forget to honor the Earth and all her creatures as well. I'm not trying to downplay giving to other humans. Charitable gifts, volunteering, and loving our families is wonderful and in the spirit of the holiday. However, Mother Earth gives to us year around and she and her creatures deserve a thank you as well.

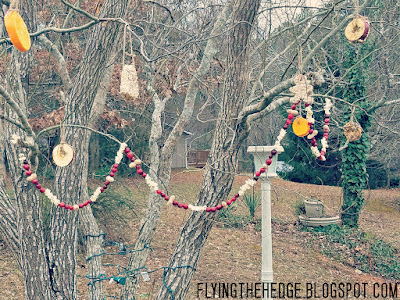
There is a gorgeous evergreen in our backyard. I'm not sure if it was planted as a live Yule tree by the previous owners or if birds brought the tree with them, but it is perfect for honoring Mother Earth and her creatures during Yule. I decided this year I would decorate it with edible ornaments and garland for the wildlife to enjoy. After all, they bring me and my tremendous joy year-round. This is also a great way to let Mother Earth know I appreciate her and all she is provided me with this year.

****

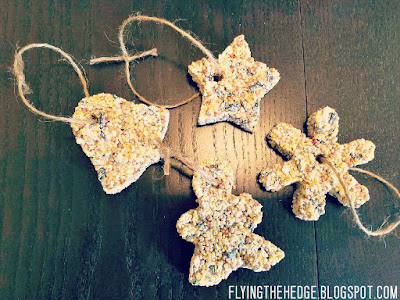
Birdseed Ornaments

DIY Wildlife Ornaments

This is actually a very simple recipe that can be used year-round to create all sorts of bird feeders. Make ornaments, suet feeder blocks, toilet roll feeders, and more!

Ingredients/Materials

4 cups Mixed Bird Seed
1/2 cup Water
3 tablespoons Corn Syrup
3/4 cup Flour
1 envelope unflavored gelatin
Yule-themed Cookie Cutters
Straw
Scissors
Mixing Bowl
Spoon
Waxed Paper
Twine or Ribbon

Directions

First combine the flour, water, gelatin, and corn syrup in a large mixing bowl. Stir until well combined.

Add the birdseed slowly to the mixture and stir until it is well coated.

Place the Yule-themed cookie cutters on the waxed paper and spoon the birdseed mixture into them. Pack it down tightly. You can use a measuring cup or a cup (anything with a flat bottom) to pack the birdseed mixture down and make the surface flat.

DIY Wildlife Ornaments

Using the straw, poke a hole through the top of each birdseed ornament. Make sure it goes all the way through as this is where you will feed your twine or ribbon through to hang them.

Allow the molds to sit for 2-3 hours. Once they are dried and set,  gently remove the straws and cookie cutters. Allow them to dry for at least 2-3 more hours, preferably overnight.

Once they have dried, cut your ribbon (roughly 4 inches) and carefully feed it through the hole. Hang them up outdoors and enjoy watching the wildlife!

DIY Wildlife Ornaments


****

Wildlife Garland

DIY Wildlife Ornaments

This has to be one of my favorite things to make and I am not entirely sure why. For some reason, I love stringing things together. You can use a variety of fruits, vegetables, and nuts to please a wide array of wildlife and add color to your outdoor Yule tree.

Ingredients/Materials

Cranberries
Popcorn
Peanuts
Needle
Fishing line

Directions

If you haven't already done so, pop the popcorn. I had used the stove because I don't own a microwave. Yeah...scandalous I know.

Thread the needle with the string or twine and begin stringing cranberries, oranges, popcorn, and peanuts in the shell. I decided to do roughly 6 feet of garland for my tree since I was adding other decorations for the wildlife as well.

If you want, lay out a pattern beforehand. Be careful with the popcorn; it has a habit of falling apart rather quickly.

If you are using popcorn, don't place outside if rain is expected over the next couple of days. The popcorn will disintegrate before the wildlife is even able to enjoy it!

****

Apple Birdseed Ornaments

DIY Wildlife Ornaments

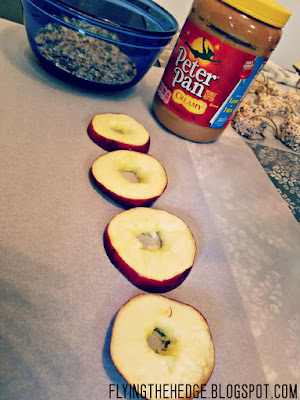
These ornaments are much simpler to make and only require three ingredients. Birds and other wildlife LOVE apples and peanut butter! Be sure to hang these low enough for the deer to enjoy. Apples are one of their favorite treats!

Ingredients/Materials

Peanut butter (creamy or chunky)
Birdseed
1 Apple, sliced and cored.
Twine
Scissors
Waxed Paper
Spoon or Knife

Directions

Spread you a sheet of waxed paper. Smear one side of the apple with peanut butter and dip in some birdseed. You want to make sure the peanut butter is completely coated with birdseed. Place on the waxed paper. Continue this process until all of the slices are complete.

DIY Wildlife Ornaments

Cut some lengths of twine and tie through the cored apple slices. Hang on your tree and enjoy watching the wildlife! Be sure to hang these low enough for the deer to enjoy as well!

****

And there you have it! Three wonderfully simple projects to bring some joy and cheer to our animal friends and honor Mother Earth for all she provides for us. I also added some orange slices to brighten up the tree and be another little snack for all the animals that visit my yard. I think it turned out rather nicely!

DIY Wildlife Ornaments

DIY Wildlife Ornaments

Merry Yule everyone!


Tuesday, December 20, 2016

DIY Ribbon Yule Trees

DIY Ribbon Yule Trees

A couple of years ago I saw some beautiful felt trees in the holiday section at Target. I decided I could make my own for significantly less and set off to the store to buy some paper mache cones, green felt, and red pompoms. Guess what! They have been sitting in my storage closet since. I sat down 2 weeks ago and began cutting out the felt and realized it wasn't work it. I didn't even want dark green trees anymore! Plus, it was starting to hurt my hand. No one wants that. So I ventured off to Pinterest to gather some new ideas. That is when my ribbon Yule trees were born!

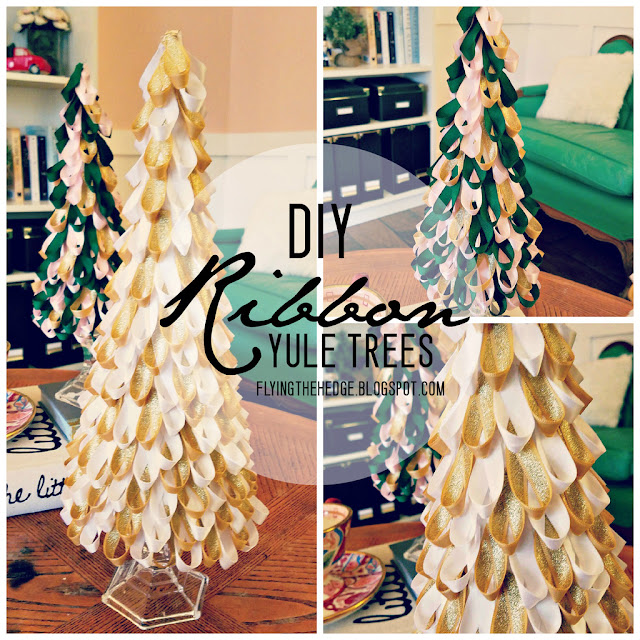
My library is green, pink, and white with splashes of brown. I wanted my ribbon trees to watch my living room so I set off to find pink, green, and white ribbons! My husband calls the library the Neapolitan room. Not gonna lie, it does make me want ice cream whenever I am in there...or tea. Same thing right?!

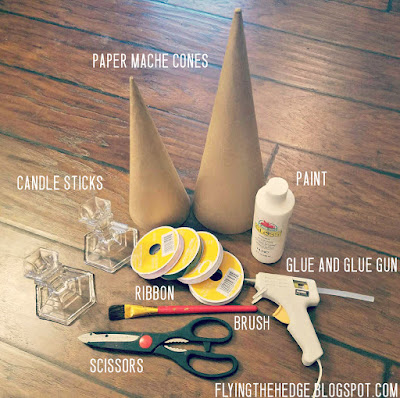
Materials

Colored Ribbons (any color you desire)
Paper Mache Cones (1-2 of various sizes)
Cardboard
Candle Sticks (from the Dollar Tree. 1 for each tree)
White paint (or another color to match your ribbon)
Hot Glue and Hot Glue Gun
Scissors
Optional: Glitter, small colored pompoms, small doll sized ornaments or tree toppers, fairy lights

DIY Ribbon Yule Trees

Directions

Begin by using the cone to draw a circle the size of the base on the cardboard. Cut out the circle just slightly smaller than the base. You want this circle to fit up inside the cone slightly. Hot glue the cardboard circles into place.

DIY Ribbon Yule Trees

Next, paint the paper mache cones. If you'd like, you can also spray paint your candle sticks. I liked the glass look so I kept them in their original finish. Allow to completely dry.

DIY Ribbon Yule Trees

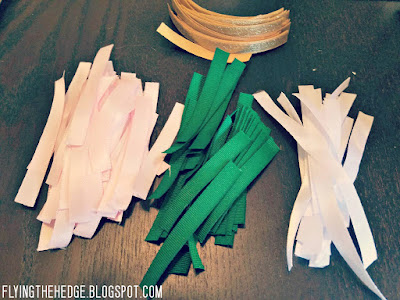
While the paint is drying, begin cutting strips of ribbon 2- 2.5 inches in length. I cut about 20 strips and worked with them until I ran out. If you want, feel free to cut an entire roll. It takes just over 1 rolls of each color to complete the larger cone if you are only doing it in two colors as I did.

DIY Ribbon Yule Trees

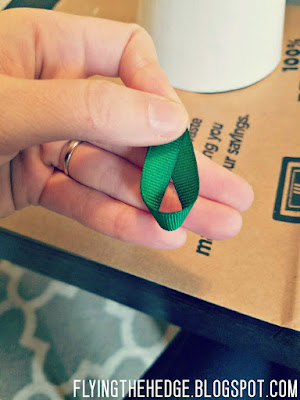
Twist the ribbon to form a loop, and begin hot gluing the loops to your cones starting at the base and working upwards. Make sure to stagger and overlap the loops to cover up the bulk of the cone. You want your trees to look full.

DIY Ribbon Yule Trees

DIY Ribbon Yule Trees

DIY Ribbon Yule Trees

DIY Ribbon Yule Trees

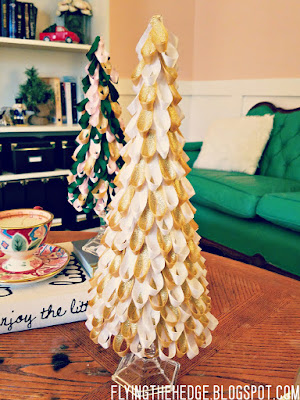
Finally hot glue the candlestick to the cardboard base and viola! beautiful ribbon Yule trees! If you would like, you can add glitter, colored pompoms, doll-sized ornaments or tree toppers, or even fairy lights to add some dimension to your trees. I used glittered gold ribbon which was enough for my tastes. Very magical indeed!

DIY Ribbon Yule Trees

DIY Ribbon Yule Trees

DIY Ribbon Yule Trees

DIY Ribbon Yule Trees

DIY Ribbon Yule Trees

Have you done any Yule inspired crafts this year? Did you try this one? I'd love to see pictures of your work in the comments!

Have a Blessed Yule!


Saturday, December 17, 2016

Box of Shadows Review: November

Box of Shadows Review: November

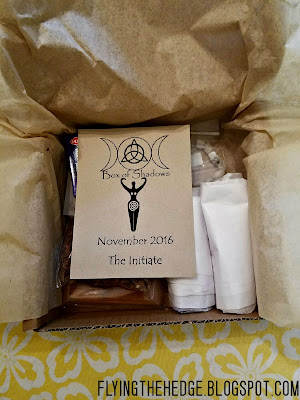
Boy oh boy is this post LATE. November's Box of Shadows was actually really nice and developed around the beautiful full moon we had last month. Unfortunately, I didn't check my mail until AFTER the full moon so I didn't get to use any of the box to celebrate last month. And because I have been so busy, I didn't have time to review the box either. Honestly, I opened it, rummaged through it, and tucked it away in my closet with my other witchcraft stuff. I'm still looking for an altar so everything is still boxed up which makes my spiritual life a wee bit difficult. Hopefully that'll change soon. I think I finally figured out what I want to use as an altar and where to put it, but I have to find the piece first! Story of my life.

Box of Shadows Review: November

Box of Shadows Review: November

Anyway, December will be the last month I receive a Box of Shadows. I decided to review it for 3 months then test another company. There are several out there that cater to the pagan community and I would like to give them all a try as well. So let's review November's box and when December's comes in next week, I'll review it as well. I know, I know...I am playing some serious catch up on the blog.

November's Box of Shadows was constructed around the full moon last month. As with every box is came with some candles, sage, an herb, and a couple of ritual trinkets.

Box of Shadows Review: NovemberLet's start with the candles. Since this box is centered around the full moon, all of the candles were colors associated with the moon. They are various shadows of blues and silver/grey. I was really excited to get such an array of candles. To be honest, I was out of blue candles after using them for a healing spell in October after my go karting accident. I'm glad I was able to restock without making a trip across town to the metaphysical store.

Box of Shadows Review: NovemberNext up was a beautiful moon candle holder. This is PERFECT for esbat rituals and spells or any magic honoring or requiring the moon. It is gorgeously made in a silver finish and will look beautiful on my altar...if I ever find one. Ha!

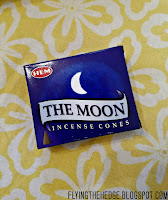
The box also came with some Moon Ritual soap that can be used prior to any esbat ritual to cleanse you and prepare you for the ritual or spell work ahead and some The Moon incense. Another great item for an esbat ritual!

Box of Shadows Review: NovemberMy favorite piece is, however, is the moonstone bracelet. Moonstone is often a pearly white color, as in this bracelet. The silvery, grey color is associated heavily with the moon, hence its name, and invokes reflective, intuitive powers and increases harmony. It brings calmness and tranquility, and is believed to absorb wishes and sent them on their way to the moon. This is something I probably need to charge and wear everyday. Like I said, I tucked everything away without pulling anything out. I could really use some peacefulness and hope right now.

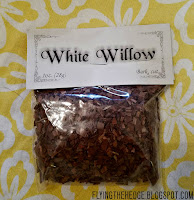
Box of Shadows Review: NovemberFinally, there was of course the white sage and a new herb, willow! Kind of obvious what my favorite tree is and what plant I feel the greatest connection with. I was super excited to receive some willow last month. Willow is associated with the moon (duh!), females rights of passage, fertility, creativity, inspiration, emotion, love, protection, and healing. It is often referred to as the tree of immortality due to its ability to regrow from fallen branches. As a pretty artistic Feminist, this tree speaks loudly to me. It brings me great joy to look upon the beautiful weeping willow in my yard. Standing beneath its branches I feel a sense of calm no other tree brings. I shall be using the dried willow often while I work on my grimoire to boost my creativity and poor loving, healing energies into it.

I have to say I really enjoyed November's box. It couldn't have come to me at a better time, but I guess that is the way the Universe works sometimes. We often send out spells and messages with our basic thoughts, dreams, and emotions without even realizing we've done so. She is always listening and bringing us what we need, not necessarily what we want.

I look forward to seeing what December's box has in store for me!


Thursday, December 15, 2016

Book Review: Your Book of Shadows: How to Write Your Own Magical Spells by Patricia J. Telesco

Book Review: Your Book of Shadows: How to Write Your Own Magical Spells by Patricia J. Telesco

Disclosure: Some of the links below are affiliate links, meaning, at no additional cost to you, I will earn a commission if you click through and make a purchase.
 
It is not an understatement to say I have been busy. Thankfully this is the last week of school until 2017, although it is finals week.; stressful for everyone involved. Despite all this, I managed to find time to sit down and read for the first time in months There is nothing quite like reading, and I need to find more time to do what I love. I just finished up Patricia J. Telesco's book Your Book of Shadows: How to Write Your Own Magical Spells. I liked this book and I didn't. As always, let's start with what I DIDN'T like.

First of all, this book is very basic. Most of the information covered is basic Wiccan practices, which is fine if you are new to the craft and/or Wiccan. I was also hoping for something...more. While this book definitely explains how to make a BOS, I was hoping to work through more tasks with the author; a workbook if you will. Furthermore, some sections and details were out-of-date. This book was written in the late 90's and has obviously not been revised since. With some updating, the book would be more appropriate for today.

So what did I like? Well, the first chapter has some really wonderful ideas on how to set up a BOS, suggested mediums, how to make and scent paper, and how to align creating your BOS with the moon phases. I really enjoyed this section, and it provided me with the inspiration I needed to start work on my own miniseries on creating your BOS/grimoire. Furthermore, I enjoyed her discussion of different section ideas. This helped me organize my own grimoire and, again, gave me some fresh ideas. The correspondences were a great refresher and her constant reminder to add, research, and cross-reference material was well worth rereading.

Overall I gave this book three stars because 1) it is Wicca and I am not Wiccan 2) it is very elementary/basic, but 3) contains some information that is worth reading. The first chapter is really the best part of the book and the only part I found useful. However, if you are looking at creating a BOS/grimoire and introducing yourself to Wicca/Witchcraft, then this book would be perfect for you. If you are an experienced witch like myself, you will find the bulk of the book is not worth it unless you need a refresher.

So, have you read anything great lately? I would love to hear about it and add to my ever-expanding library!

Saturday, December 3, 2016

Still Here!

Hey everyone! I just wanted to check in really quickly to let everyone know I am still alive and well. I needed to take a month off from my computer. Sitting behind one half the day at work doesn't make me feel like coming home and doing the same thing. I have also been suffering from a bout of depression again making it extremely difficult to become motivated to do anything resembling work, even if it is something I enjoy such as this blog.

That being said I have several posts planned for this month regarding different Yule crafts, blessings, and traditions. As long as my depression does not continue to get the best of me, these are things you should start seeing over the next couple of weeks.

If you have been following the blog on Instagram you may have seen I have some somethings lately, including working on my grimoire. I am slightly disappointed that I cannot paint the pages as the paper is too thin, so I have been working with markers, a medium somewhat new to me. Yes, I can color with markers and I have a dozen times, but markers don't blend and mix like paints too. I am considering using markers then lightly going over my drawings with paint as well, just a little bit. I think it may end up creating some truly stunning pages.

Here are some peaks at what I have done with just markers and some sketches I have made. I have a Grimoire Challenge planned for 2017 and would love to see everyone participate to create/update their Books of Shadows and Grimoires.


As I said, I hope to be back soon. I've just needed some time off from everything.

I hope everyone else is doing well!